How to create an eflyer with an existing listing
- mic5398
- Oct 11, 2018
- 3 min read
If you wish to create an eflyer and you already have a listing, follow these steps:
Log onto your account and click the Eflyer icon on your dashboard.

You will see all of your listings appear. Click Create New to get started.

Take the time to look at the templates available and choose the one that best suits your needs. You can search the templates by selecting the template criteria in the left hand column and restart your search by clicking the Reset Selections Button.

Click the options menu below the templates to preview a larger image of the template and then click select when you find the one you wish to use.

The blank template will appear on the right complete with your listing details and your contact information. On the left you will see the editing panel. You can edit and add content to your eflyer by clicking the tabs for Images, Text, Subject, Links and Social.

First click the Images tab upload button in the image box to upload your images. For the best virtual tour experience for viewers, upload all of your images here. This will also make it easier to find the image that works best in your eflyer.

To add an image to your eflyer, click on the image you wish to use and drag them into the green image squares. To replace an image, just click on the new one and drag it over the existing one. If you wish to delete an image square, click the blue X.

To bring the image square back click the green check mark.

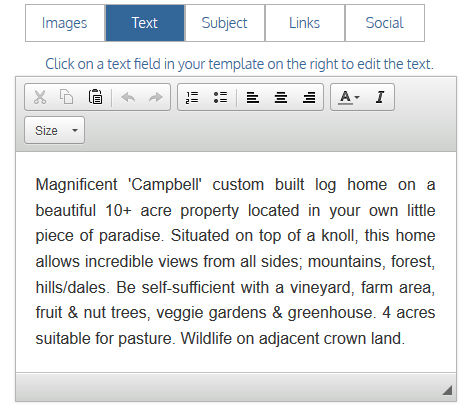
To edit copy click the text box you wish to edit on the template. It will appear in the side panel where you can make your edits. You can add, change and delete copy as well as change the size and color. You can click the Save button when you are done, or just click on the template to save your work.

Click the Subject tab to add add your subject line and enter your text which will appear above the template as well as on the View Proof tab.

Click the links tab and you will see your free virtual tour/single property website link. You can choose to delete it if you don’t wish to include a tour. You can also highlight the link and add your own tour link. A new feature allows you to add as many additional links as you need by clicking the Add Link button. The first link is activated when viewers click anywhere on the eflyer.

To add social media to your eflyer click the Social tab and the social media links you’ve added to My Account will self-populate. To delete social media from your eflyer just click the circle beside the icon and reclick to re-add it. To add social media links not in your account, click the Add button, enter the links and save. Your social media icons will then appear.

Once you are satisfied with your elfyer, click Proof on the main navigation to see the entire eflyer exactly as it appears in an agent’s inbox. Use this page to proof your eflyer, look at your contact info, subject line, check your links and social media before you blast out your eflyer to avoid errors. You can also email a proof to your client. If you spot an error or wish to make a change just click the Edit Further button.

To send your eflyer you have three options: Use our mapblast tool to reach agents in the areas of your choice, upload or add your own contacts, or do both.


Comments